Island Style Barbecue Chicken, "Bitter" Herb Potatoes, Greek Salad?
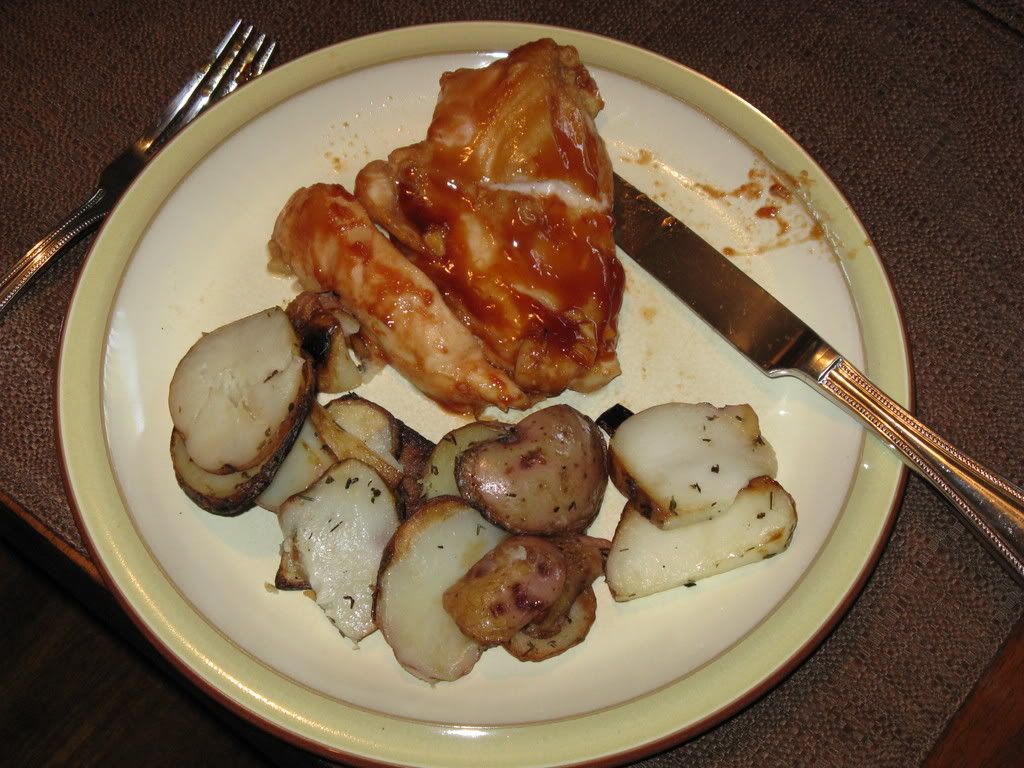
Chicken and Potatoes

Greek Salad: Megan made it!
Island Style Barbecue Chicken
Ingredients:
1 1/2 lb boneless, skinned chicken breast
1/4 cup Ketchup
1/4 cup soy sauce
6 tablespoons of sugar
2 tablespoons dry sherry
1 small piece of ginger root, crushed
1 clove garlic, crushed
1/2 teaspoon salt
Pretty simple, this one. Preheat your oven to 350. Grease down a 9 x 13 pan, set down the chicken skin-down. Mix all other ingredients together in a bowl to create a barbecue sauce, brush onto chicken. Cook for about 15 minutes, flip and brush the other side, then finish it up for about another 15 minutes. You may have to watch the time, it might take less...and since it was a week ago I'm forgetting how I did it exactly. I think I ended up doing the same amount of time with more odd flips in between.
"Bitter" Herb Potatoes
Ingredients:
Red Potatoes
Olive Oil
4 or 5 cloves of garlic
Basil
Thyme
Salt
I pre-heated a pan with olive oil. Cut red potatoes into slices, the thinner the better (my knife skills are sloppy with ill-practice, so mine were kinda thick.) Throw into pan, add chopped garlic cloves and sautee. As its going along, add Basil and Thyme to taste; it doesn't take much. The bitterness of the Basil and Thyme work in conjunction with the natural buttery-ness of the red potatoes and the kick of the garlic in a very interesting way. It's honestly not one I would've thought of, but my brother happened to be there at the same time and I told him to pick a spice to add. I was hesitant about the thyme, but it worked.
A trick I've found with sauteeing potatoes that are particularly thick is to kill the heat or lower it and then add the lid to the pan. This forces the steam back into the potatoes and softens them up a lot.
Greek Salad?
This is Megan's salad. She just made it out of Feta cheese, bagged salad greens, Basalmic Vinnegrette dressing and cherry tomatoes. Simple but yummy!
Results
The chicken, as one might imagine from 6 tablespoons of sugar, was really sweet. I think to me it was similar to a honey-based barbecue sauce, though there is a distinct sweetness and tangyness to it. It's good, but it's not how we usually like our barbecue sauce, so it wasn't a bad recipe, just didn't match our personal taste. Also, I don't think you need to keep the skin. It didn't crisp up at all, so I didn't see the point in keeping it on there. I suppose one might throw it on a pan to crisp up. If you try it, let me know.
The potatoes were kind of bitter, but still melty and warm tasting. Nothing like a little improvised potatoing to cap off a dinner. Very good call by my brother on the thyme.
And of course, Megan's salad was good.
=====
I think our grill needs some attention this week. I'm gunning for Wednesday.
In case you're wondering tomorrow we'll be eating the Italian soup I posted about a while ago. Just click on "soup" on the tags to check it out.
Monkey Bread
Last week I didn't cook anything of note. Monday we did the tacos which have been so successful in the past, and Wednesday we were invited to the New Price's (This is AJ and Rachelle; as opposed to the old Prices which would be Matt and Jeni...also, we didn't go to Scotland.) to have a meal with all Prices. They made a really cool Lasagne with goat cheese and bison meat which resulted in a tangy and satisfying Italian variant.
I brought completely unhealthy dessert items.
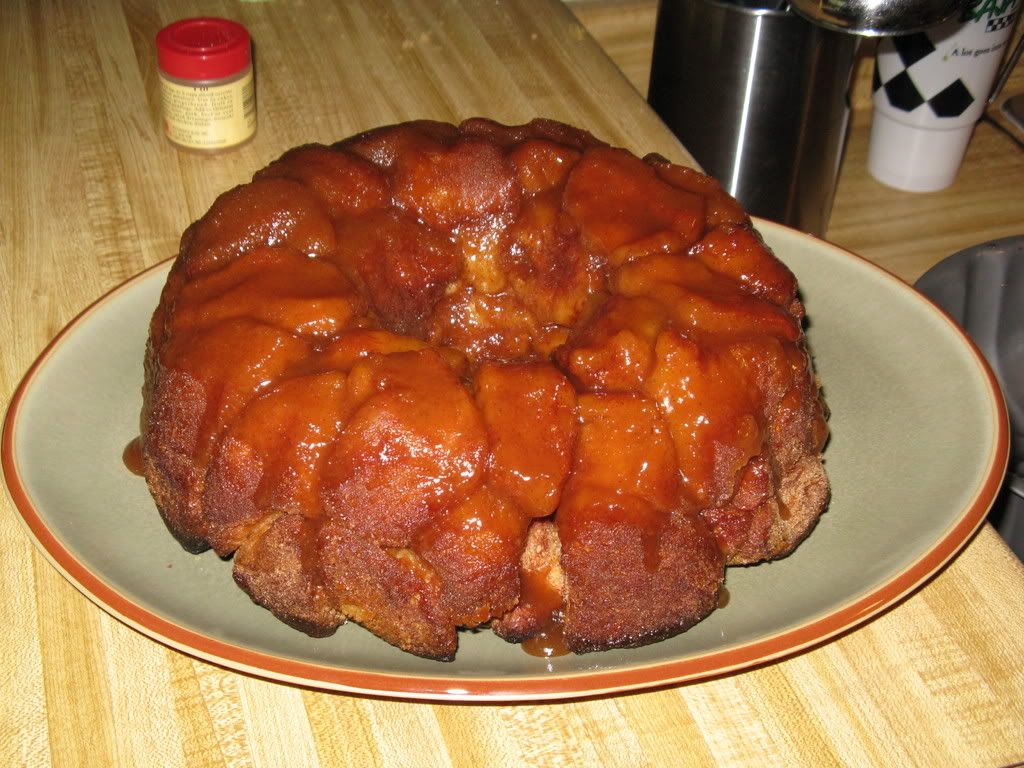
Monkey Bread
Ingredients:
1 Cup Sugar
1 Cup Brown Sugar
1 Cup Butter
3 Tsp Cinnamon
2 cans Grands Biscuits (extra rich, non-flaky)
Ah, looks healthy already doesn't it? This recipe is pretty automatic. Preheat oven to 350. Take 1/2 cup of both sugars and the cinnamon and put them into a ziplock bag, gallon-sized. Open your biscuit cans and quarter them. Put the biscuits into bag and coat with the sugar mix. You might to shake or push or whatever it is you enjoy doing whilst...coating.
Now, the caramelizd glaze. Take the rest of the sugar and your butter, put into a saucepan and caramelize.
Taking a bundt pan, put in half of the biscuits. Then pour in half of the glaze. Then put the rest of the biscuits in and then pour the remainder of the glaze. Bake for 20-40 minutes, making or until knife blade comes out clean from testing.
I...actually burned mine a tiny bit. I didn't hear the timer go off. But it was still 95 percent edible! So, it's a pretty fool-proof recipe. This is a Rockney family staple and works wonderfully at parties or for a rather rich breakfast treat.
=====
Before I went on hiatus I actually did one rather complicated project. I made eclairs completely from scratch for my dad for Father's Day. But...that story is one of tragic endings. One day I'll get up the courage to type it out. It's only now starting to be funny.
My grandpa apparently found a collection recipes that my Great Uncle Larry had made from a variety of newspapers. He scanned it and gave a copy to my dad, who in turn gave me a copy on a DVD. I just started looking at them to day and there is a GIGANTIC amount of recipes in it. All from Hawaiin newspapers. So, I'm going to start off next week by trying out Island Style Barbecued Chicken. Looks easy and should be tasty. We'll see what the past has to offer!
End of the Hiatus is Nigh
Apologies for the break. But over the past six weeks, Megan has been working at nights, and without a second mouth to feed my motivation to duel the culinary world plummeted. But prepare thine tines and swashbuckle your spoons because starting next week we shall be a cooking again!
Huzzah!
Chicken di Rockney/Emiril? and Sweet Vegetables
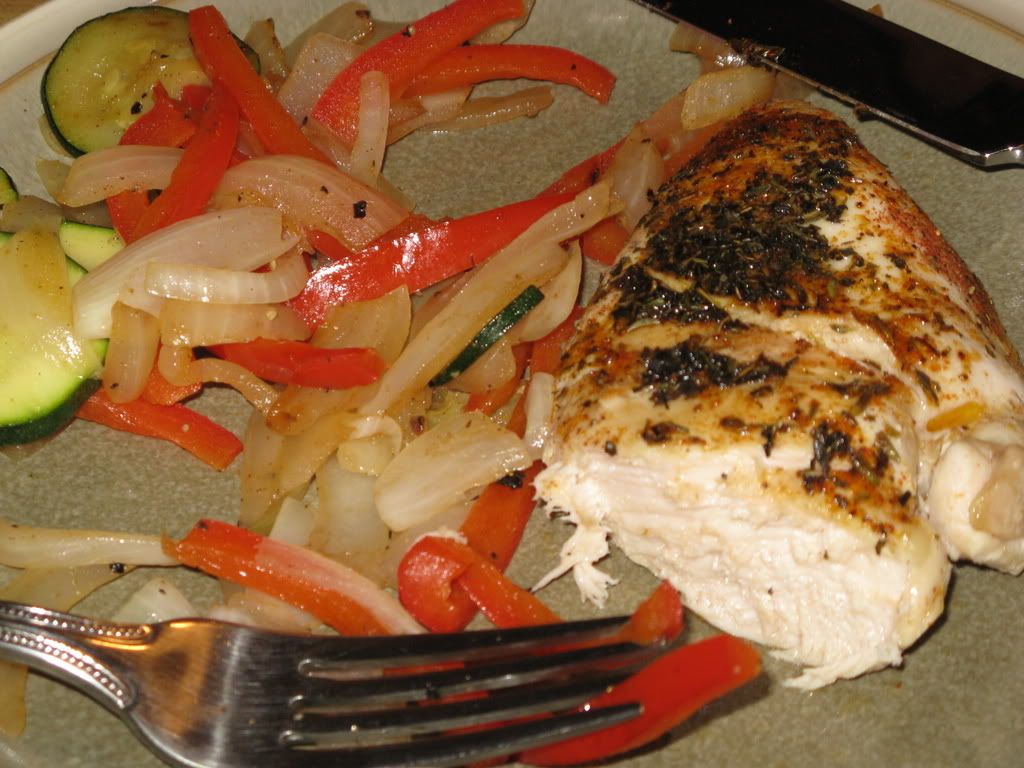
Chicken di Rockney + Emiril
2 Chicken Breasts (around a pound)
Olive oil
Herbes de Provence
Emiril's Essence
Emiril's Essence (Found on Food Network site)
2 1/2 tablespoons paprika
2 tablespoons salt
2 tablespoons garlic powder
1 tablespoon black pepper
1 tablespoon onion powder
1 tablespoon cayenne pepper
1 tablespoon dried leaf oregano
1 tablespoon dried thyme
This was a bit of improvising. Chicken di Rockney is what Megan's parents make quite frequently, and it's pretty good. It's basically just an herb chicken; olive oil, then add Herbes de Provence (the main flavor) and then Basil. Bake and serve. But instead of just throwing that in, I decided to bring out my container of Emiril's Essence and toss that on there.
Good idea.
Emiril's essence is a little spicy and definitely zesty and peppery. It's really good and quite easy to make and store. I first made it back when I did the Chicken Marsala recipe and I've used it about three times on a whim since then adn have had great results every time. I do forget to say "Bam" though.
Anyway, oil, Essence, Herbes de Provence. I use tin foil to increase ease of cleaning. Bake in oven at 375 for about 25-30 minutes (45-50 if breast is frozen). Then you're pretty much done! Super easy peasy.
Sweet Vegetables
Red Bell Pepper
White Onion
Zucchini
Salt
Pepper
Cumin
Cinammon
Ah, now this is where I got creative. Megan brought home these vegetables and told me to sautee them with olive oil in a pan (just a bit of olive oil). So as I was doing so, I glanced over my shoulder and waited until she wasn't looking, then opened up the spice cabinet and went to town.
My theory was this: I knew that the chicken would be a little spicy because I'd used the Essence before. So if I was going to season the vegetables in a direction, I should take it sweeter.
Good idea.
Just a tiny bit of salt (two twists from my sea salt grinder), much more ground peper (10-15 twists?), two pinches of cumin and just a dash of cinammon. When sauteed, both bell peppers (especially red, in my opinion) and white onion become sweeter as they are cooked longer. The cinammon is REALLY key in bringing out the sweetness even further while I feel like the cumin sort of neutralized any remaining harshness from the peppers and onions. Cook until you are satisfied with softness.
The sweetness was an amazing off-set to the spicyness of the chicken and was quite enjoyable. Not bad for 30 minutes, huh? Watch out Rachel Ray, I'm coming for you.
===
My hope is that tomorrow I'll be stir-frying. Stay tuned.
The Food Labs will be opening soon. You'll see what it is when my brother finishes the banner, but Pizzadillas would've been part of the Food Labs had it been around.
I've become enamored with this concept of chile peppers and chocolate. Anyone that's ever seen Chocolat knows or if you're a chocolate lover like me knows that the ancient Mayans used to drink this bizarre drink that was a combination of chile water and chocolate. I'm really curious to see what happens when you mix those ingredients together...maybe when I have some time...
Pepper Chicken Repeat, Roasted Cauliflower

Yipes!
Why are you looking at a picture of a distressed tomato? Well, that's simple. I forgot to take a picture of the meal I made yesterday. And as such, the tomato, who has been waiting quietly in the corner fully content at the use of pictures in each entry, was quite fretful that there would be no picture today. So he volunteered his services. Hopefully we won't see too much more of the Worried Tomato in the future, but at least he's around in case we need him.
Anyway, yesterday I made the Pepper Chicken, previously featured on this blog, and roasted cauliflower for Megan's parents yesterday and it was a smashing success. It was also the first time I used the public grill and I have to say, it's quite a bit better than fighting that grill pan. It's not too far from the apartment, and since no one else ever uses it, why the heck not, right? So me and public-grill will be getting far more familiar with one another in the coming days as my cooking skill sharpens.
===
The original entry on Pepper Chicken. I skipped the lime sauce this time, but did nothing different in terms of ingredients. Cooked it on the grill for about 20-25 minutes total on medium-high heat, although I changed the heat settings many times since I was getting used to it. I'll have to try a more controlled test next time.
Roasted Cauliflower
1 really big head of cauliflower
Olive Oil
Salt and Pepper
Have you ever wanted to eat something that looks like a white brain but the idea of boiling/steaming it just to chomp on a mushy vegetable puts you off? Well, have I got the thing for you. Roasted Cauliflower is an Ing Family staple (although a relatively recent one) and has been acclaimed as a favorite by all who have chomped into it.
The process is simple. Preheat your oven to 450. Take the head, chop it into chunks. No real shape or size is needed, I'd say no larger than 2 inches long at the most. Megan did it much smaller and it came out fine, so meh. Spread out the pieces on a baking sheet (lipped, as you'll be using oil and you don't want to start a fire in your oven...I have personal experience with that one.) and coat lightly with olive oil. Add salt and pepper and mix it up with your hands. The cauliflower will shrink considerably from the heat, so don't worry about it being too much. Throw in oven.
The only real downer of this recipe is that it takes 45-min to an hour to roast thoroughly. Check it every 20 minutes and stir it up with a spoon, keeping the cauliflower even. Once the cauliflower has shrunk and is golden brown on the edges, take it out and eat. It's really simple, really good, and a fun new way to deal with vegetables you may not otherwise eat.
====
Not much else for this week: My dad's retirement party is Wednesday so no cooking on that day. Megan leaves this weekend for a women's retreat leaving me alone. I may try a few solo runs with some steak ideas I have, but we'll see how motivated I end up being.
Taco Night!
For now, though, let's talk Tacos. Megan loves tacos and taco night has been a standard option for us since we've gotten married. Partially because it's nearly automatic and it's always satisfying. Last night, however, we were feeling adventurous and decided to do a "gourmet taco" with some more home-made ingredients. The results were spectacular, and so, here's a post about it.
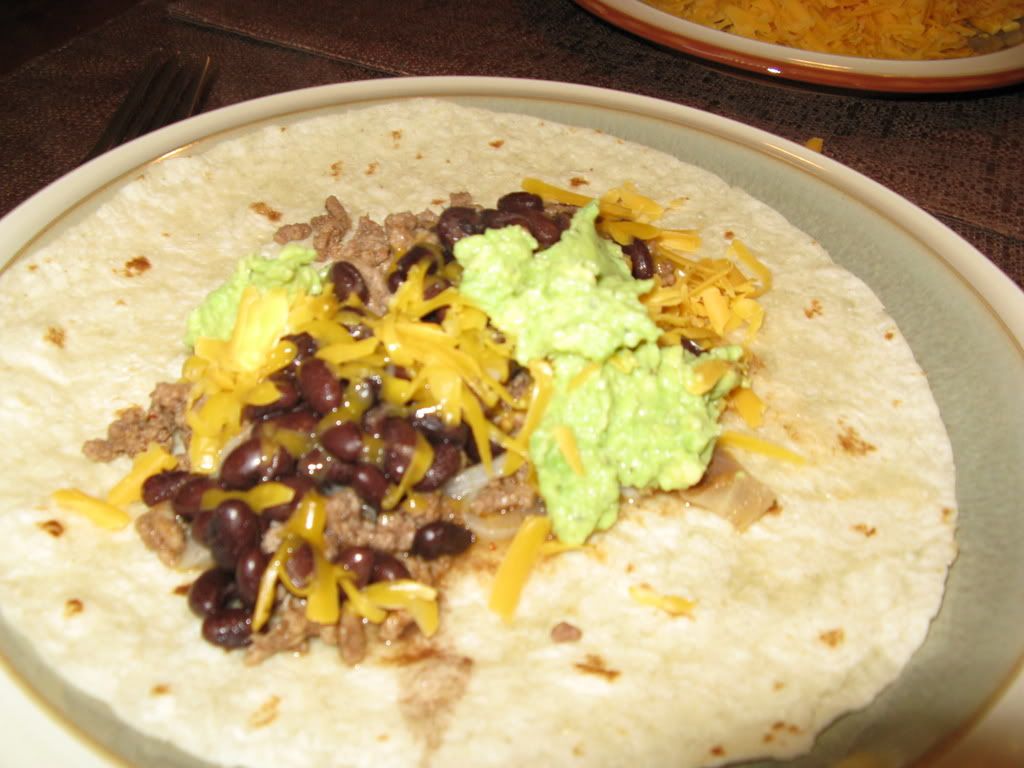
Taco Components
1lb of Ground Beef (you can substitute Turkey...but you know how I feel about that)
Homemade Guacamole
Black Beans
Grated Cheddar Cheese
Tortillas (duh)
Olives (I didn't put any in mine: Megan loves olives)
Homemade Taco Seasoning
White Onion
Sour Cream (another Megan-only thing)
Taco Seasoning
This is the original recipe
This is what I ended up using. It's nearly identical, it's just missing cayenne. Not that I don't like it, I just didn't have any.
1 teaspoon chili powder
1/4 teaspoon garlic powder
1/4 teaspoon dried minced onion
1/4 teaspoon red pepper flakes (or more to taste)
1/4 teaspoon oregano
1/2 teaspoon paprika
1 1/2 teaspoons cumin
1 scant teaspoon sea salt
1 teaspoon black pepper (about 40 grinds)
Mix and throw on your taco meat, then add about a 1/4 cup of water. Pretty simple. It looks like a lot of seasoning, but throw it all in, it needs it. The flavoring is amazing, much better than the Lawry's packs we used to use (cheaper too, since we already had all of the spices in the rack). We personally missed the cayenne; it could stand to be spicier in general, especially when you use cheese and sour cream, etc. Still, it's a very savory seasoning that doesn't quite have the strange acidy bite that the Lawry's packets have and it's quite satisfying to have done it yourself.
Taco Meat
We bought the beef from Trader Joe's. I was surprised in the immediate difference in quality: so much better! And cheaper. Anyway, I only put this here to mention that we put white onions in with our meat as we cooked it. I think next time I'd put the onions on first, then add the beef to the pan so that the onions have a chance to get extra-cooked. Maybe a bit of olive oil next time too: the beef was so lean that it was hard to get the onions to sizzle the way I wanted them to.
Guacamole
1 Avocado
Juice from 1/2 lime
Salt and pepper
All right, since I know this place is frequented by Prices I'm sure to get a lecture on proper Guacamole making (I hope I do, anyway) but since this was my first foray into making it, I kept it simple. Mash the avocado (I used a potato masher: worked well, took about 5 seconds to get to the correct consistency) then squeeze half a
lime over it. Add salt and pepper to taste. Simple but effective. A neat trick for your next party? Perhaps!
====
The in-laws are coming over on Monday so I have to think of an interesting chicken dish. We'll be doing roasted cauliflower for sure that day, which I think some of you might enjoy. I just have to pick appropriately.
Lunch
The problem is that it's difficult to have something delicious that is also easy to transport and doesn't require any additional steps for cooking/preparing. I've been having salads and sandwiches for over two years now and I'm just sort of stuck as to how to vary my routine. Not to mention that salads are sort of time consuming to prepare and difficult to pack especially on bike days.
So, friends, what do you do?
I've been monitoring a number of bento blogs, bento being the japanese style of making lunch boxes. Their cooking methods look interesting as they are delicious and homemade but are designed to be eaten at room temperature. I haven't had the time or courage to try making one yet, but it's an option I'm seriously considering.
So if you have any lunch-time tips or favorite things, share them in the comments! I'd be much obliged.
Big Update: Cottage Pie and the great Pizzadilla and Mozzarella Stick Experiment!
By that I mean, without qualms, most "white" food. Casseroles, potato salads, coleslaw, meatloaf. I won't eat any of it (well, occasional casseroles get a pass for me). This is simply because I didn't grow up eating it. To me, why mix all those ingredients in a dish and melt it together when you could prepare those ingredients separately and come up with a much more pleasant experience?
Of course my marriage to Megan has changed that experience some. By force, mind you, but I have become slightly more open to the idea of these mixi-cated dishes as meals. Plus my adventures in cooking have made me a little more apt to try things I normally would not have. So when AJ suggested we make a cottage pie, my initial reaction was "Ew!" followed by "Hm..." followed by "Why the heck not!"
I'm glad we did it.

All day I had "God, That's Good!" from Sweeney Todd stuck in my head.
Ingredients
Cubed stew beef
Packet beef stock
5 lbs of potatoes? I think it was 5.
Carrots
1 bag frozen peas
2 yellow onions
Soy Milk
Salt/Pepper
Worcestershire Sauce
Herbes de Provence
2 heads of garlic
I'm doing this from memory, and since it was on Friday and it is now Wednesday I may make a mistake. AJ feel free to jump in and correct me and I'll edit the post as needed.
We didn't use a real recipe, but we did have this one on hand as sort of a reference.
Ok, this dish was a lot of work, so it's not a quick and easy weeknight thing by any means.
The best part about this, I think, is its infinite customization. You could add whatever vegetables into the center or remove whatever you don't like. Of course you probably wouldn't want to toss say, a bell pepper in there, but you never know.
First step: Start boiling your potatoes. AJ did not peel them, it's up to you. He also chucked in the potatoes before the water came to a boil, so that's kind of a cool idea. I once again used the Pasta pot with the built in strainer. Also preheat your oven to 350.
Then it's chopping/mincing/julienne time. Mince the garlic, place into a small dish or into a pile somewhere. We julienned the carrots, but you can cut your carrots however you want. Then chop your onions, also place into a pile. AJ also sliced down the size of the beef pieces; the cubes for the stew were just slightly too large to be eaten comfortably within a pie setting.
Brown the beef a bit, then add beef stock and simmer. We overcooked our beef a little bit, but with so many things moving in the kitchen at the same time it was hard to keep track. Add W. Sauce to taste, then add peas and carrots evenly throughout.
For the potatoes, AJ used my...hand mixer? Super slicer? I can't remember what it's called at the moment, actually. In any case, it's a hand thing with a spinning blade. I'll look at the box when I get home to give you a proper name. He used it to blast the potatoes into their final creamy form, forgoing the need for the hand-masher. Then add the onion, garlic, milk (we used soy milk for Rachelle's sake) and then salt and pepper to taste.
OBJECTION!
AJ posted a better potato instruction in the comments. Apparently I really wasn't paying attention while he was doing it. So, I have placed it in the main entry for clarification.
Corrected Potato Procedure
Put water on heat to boil. Chop up
potatoes into about .75 inch chunks. Throw chunks into water. If you
wait for the water to boil you will just be wasting time and
electricity/gas. The small chunk size will cook them evenly. When you
can stick a fork through them with moderate ease take them of and drain
them.
Put the pot back on the stove and pour in a good amount of
olive oil. This will be the only fat used, so don't be too frugal with
it. Once heated, throw in a respectable amount of chopped onions and
garlic. These should be measured in heads and bulbs, not cloves and...
um... whatever a small unit of onion is. Saute!
Then add milk.
Go ahead, add too much! We don't want dry potatoes. Then dump on
potatoes and blend, with an IMMERSION BLENDER, until creamy. Too dry?
Well, you didn't add too much milk. Too wet? Thats fine. Just let it
sit on heat until the desired consistency is reached. The excess now
evaporated milk will just help with the creaminess. Salt and pepper to
taste.
Eat out of pot while making the rest of your food.
Serve with entree.
Go back for seconds... and thirds.
Place extra in container in fridge for another time.
Eat any stuck to the spoon and pot while cleaning.
Go back to fridge in an hour and eat leftovers.
Repeat same cleaning method with leftover container.
Repeat.
Meanwhile in beef land, strain out the meat and vegetables from the rest of the juice, place into a casserole dish or whatever preferred baking dish you like. Then take the strained juice and place over low heat and thicken it. Ideally one should use corn starch, but I didn't have any and we used about three tablespoons of flour, pre-mixed with water to prevent clumping. It...didn't quite work. At this point you can also season the liquid to taste: I added additional pepper and just a bit of Herbes de Provence. I'm not sure the HdP did anything, but hey, I knew it was there.
In any case: pour thickened liquid over vegetables then layer with potatoes on top. Bake in oven at about 350 for 30 minutes. Remove, cool, eat.
As I said before, our beef was a little chewy; slightly overdone because our attention was divided among a few other things we were working on. But it was still quite good. As you can see, however, our liquid pierced through the top of our potato layer, preventing our potatoes from every really browning and crisping over like in our example recipe. Between the lack of thickening that my failure to provide corn starch created and I think sheer amount of liquid, AJ thinks that it boiled while in the oven and bubbled through the surface. I think a combination of proper thickening and using just a little bit less of the liquid would prevent that.
Still, over all, it was quite a good meal. Filling and satisfying. And it was a fun learning experience for me as AJ was head chef on this venture, showing me his processes and steps. As you can see it involves rather little measuring and quite a bit of guesswork and eyeing out, but I sort of have a fondness for that kind of cooking.
I hope to have AJ and Rachelle over again for more adventures in cooking. Next time I'll take the lead though and show AJ something...like...I dunno, the Ing Steak-Thumb method? That's a secret move that's pretty cool.
=====
Ah, the great experiment! No, I'm not talking about our system of government, I'm talking about the most delicious mis-hearing of a word ever: Pizzadilla.
As stated previously, the concept came from a conversation my brother Matt and I had on the phone, by which I told him I was making Quesadillas (with said quesadilla in mouth) and he thought I said Pizzadilla. The great experiment began!
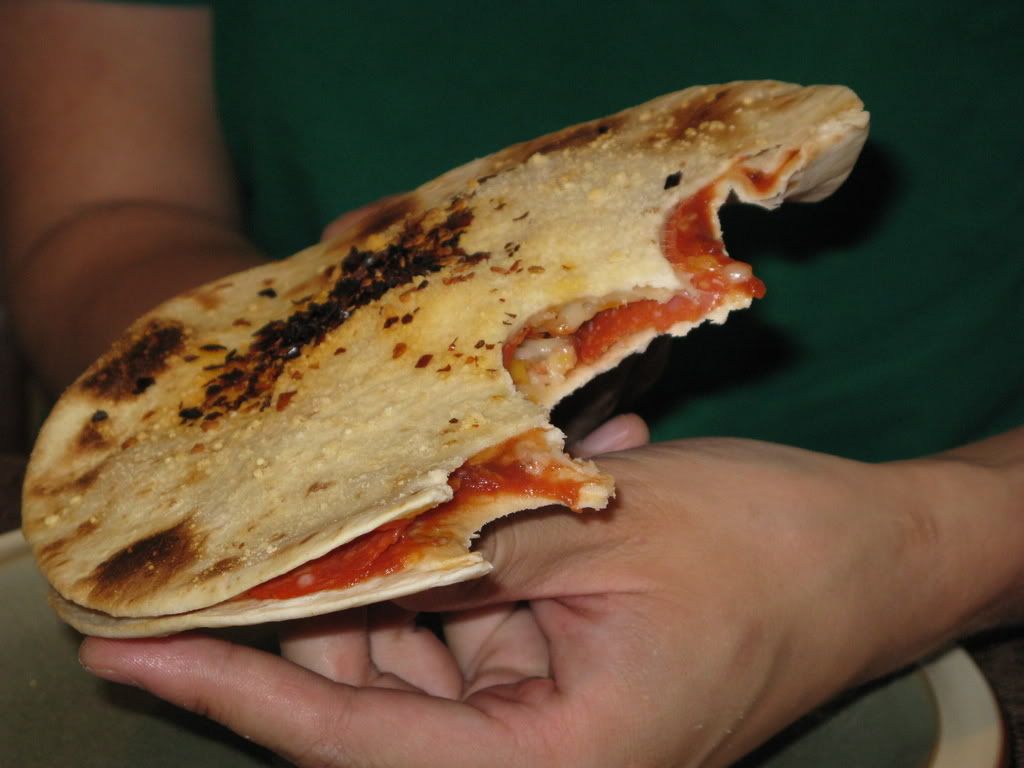
The pizzadilla, as modeled by Matt.
Ingredients
Flour tortillas (We used taco-sized Mission tortillas)
Pizza sauce (We used Boboli pizza sauce packets)
Cheese (We used mixed Pizza cheese)
Pepperoni (We used turkey pepperoni: it crisps up really crunchy)
Italian Sausage (I browned some up)
Parmesan (optional)
Crushed Red Peppers (optional)
Olive Oil
Ok, pretty simple idea and really, you probably don't even need to read the ingredients or the procedure: but we did try it with two different oven settings and two different ingredient combinations. So let's see the results!
Pizzadilla 1
Ingredient Order: Tortilla, Sauce, Cheese, Pepperoni and Sausage, a bit of Cheese, Tortilla, Brushed Olive Oil, Parmesan, Red Pepper.
Oven Setting: Broil
This takes about two minutes. Broil is very hot and applies heat from above, which gives it that crunchy, crispy aspect (the pictured Pizzadilla is Pizzadilla 1). This was a smashing success, though as you can see the crushed pepper got scorched and effectively destroyed its flavor. I think we both ended up brushing ours off, actually. In any case, I really liked the crispiness of it because it felt more pizza-like. Quite delicious!
Pizzadilla 2
Ingredient Order: Tortilla, Cheese, Sauce, Crushed Red Pepper, Pepperoni and Sausage, Cheese, Tortilla, Brushed Olive Oil, Parmesan.
Oven Setting: 450
Ok, I prefer this ingredient order. With cheese on both sides of the tortilla it holds together better (Pizzadilla 1 was a bit slide-y) and putting the red pepper inside the sauce prevented it from being scorched, giving it that extra kick. I do not, however, like that oven setting. It took much longer to bake this way, about 5-10 minutes. This slower cooking made the Pizzadilla much softer and in someways, much more Quesadilla-like. I prefer the crunchy kind myself, but if you like it soft, 450 is the way to go.
I think the ultimate Pizzadilla would probably be Ingredient Order 2 on Broil.
Unofficial Pizzadilla 3
Using the leftover ingredients, I made one on Monday, but this time used the Toaster Oven on Broil. It is equally effective to broil in a toaster oven, but it takes longer. Still, it does save you from having to pre-heat and subsequently heat up your apartment, something you don't want this close to summer here in Los Angeles.
Experiment result: A smashing success! A great lunch-time food or maybe even for a party? I think maybe using the larger burrito tortillas could lend to making an appetizer as well, if you slice it up with a pizza cutter and throw on a plate.
=====
I love mozzarella sticks. So when I saw this recipe, I had to try it. We had these on Pizzadilla day.
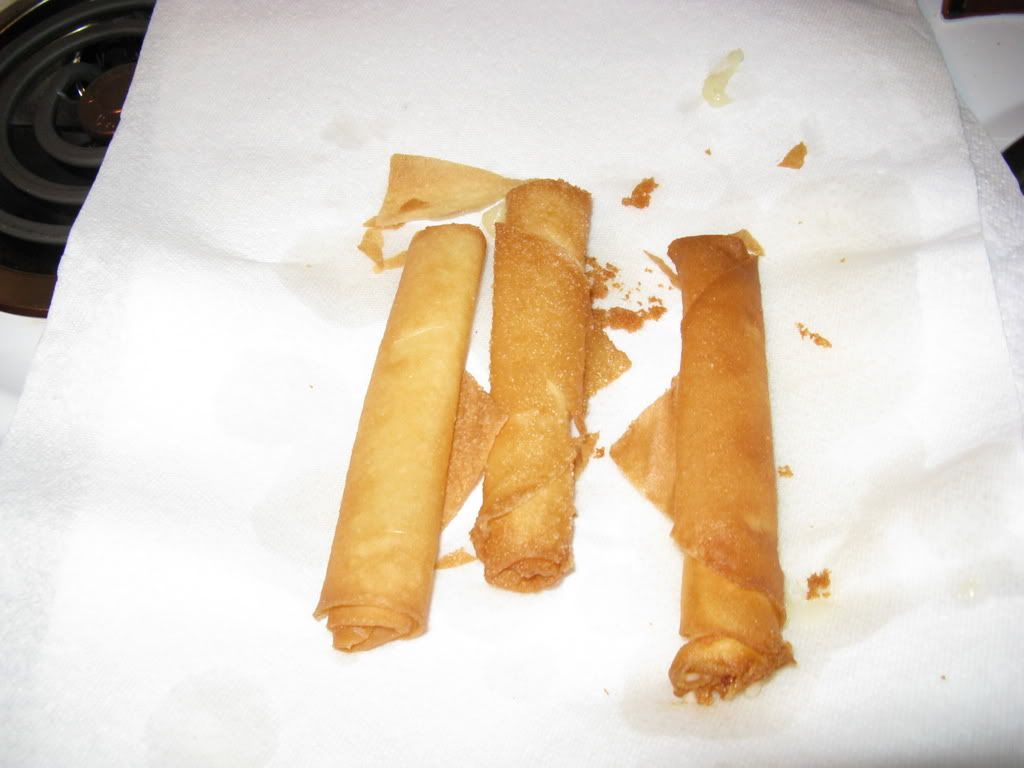
Don't be fooled: Italian Goodness waits inside!
Here is the recipe.
Ok, this is pretty simple.
String Cheese
Egg Roll Wrappers
Oil.
Ta-da!
I do want to mention one thing about Egg Roll Wrappers, however. We spent forever trying to find them: looked in Vons, looked in Gelson's, and ultimately went to a Korean market where my brother and I were assaulted with the smell of Kim Chi and fish and were given sidelong looks as to say "What're those guys doing here?" to find them. But the sad truth is you can find them in a regular grocery store! The key thing that I did not know is that Won Ton and Eggroll wrappers are refrigerated. You'd think I'd know that, but I didn't. So if you want to try this, remember that tip.
Ok, heat your oil to 350, wrap the cheese, fry it, dry it, and eat. REALLY REALLY REALLY GOOD. Like, it shouldn't be that good type of good, but it is. The cheese melts perfectly, the eggroll wrapper is easier to eat than the normal breading found on Cheese Sticks and it's simple and good. Another good appetizer method for not a lot of work!
=====
Not sure when I'll be posting again: Took Monday off as I was cooked-out from Friday and Saturday. I may make something simple tonight and if it's a recipe I haven't posted I will, but no big projects for this week.
Family Secrets!: Next week, however, my grandparents are coming into town for my brother's college graduation. On Monday my dad and grandpa will be teaching me their secret Korean BBQ Wing/Beef Recipe, a recipe that has to be conducted entirely by taste. I will definitely be writing a post about that once it's concluded: though don't expect me to tell you what's inside :P .
Greek Lemon Chicken and Spanakorizo

Greek Lemon Chicken
1 lb. boneless skinless chicken breasts
½ cup fresh lemon juice
1 teaspoon lemon zest
1 teaspoon dried oregano crushed
2 minced garlic cloves
2 tablespoons olive oil
Salt and pepper
Recipe from mom. Pretty straight forward chicken. Throw the ingredients together, put in ziploc bag with chicken for 30mins - 2 hours (my mom said she has done it overnight and it hasn't tasted too overwhelming, so that too is an option.) Then grill on skillet or grill pan. I actually never ended up using the salt and pepper in my recipe and I didn't miss it, so if you're going low-sodium don't be afraid to ditch it. My lemon juice came from two fresh squeezed lemons, and then the zest from one of them. The two lemons made about half a cup, so if you prefer the fresh-squeezed or are just trying to gauge how much that is, there's a tip for you. They were normal sized lemons.
Spanakorizo (Greek Rice with Spinach)
Original RecipeFound this on the dear ol' Food Blog search (I put a search bar on the left if you want to try it out.) I followed this recipe pretty much exactly except I couldn't find Dill at Vons, and so I used basil instead. I used Calrose rice in the Rice Cooker to prepare, but you can use your favorite method.
The results were mixed. The chicken came out very good, though I only marinaded it for 30 minutes and think that it should go longer. I started late and was pressed for time, but all in all it was quite delicious and moist chicken.
The Spanakorizo...well, I really liked it. Feta cheese and spinach and onion and rice all mixed together, really good. Megan didn't like it at all though. So that one goes off the list of repeat foods. Oh well, it was fun to try and I suppose not everything can be as a sensational a hit as Veggie-Penne (or Penne Delicious, as Amy calls it).
This was pretty quick to make though, so if you like Greek food and you've got an hour you can whip this into shape and have a satisfying meal.
=====
I noticed: That since I've started cooking regularly, I haven't repeated a dish once. Which I think is pretty cool, considering that often times people who cook complain about falling into a rut. I'm really liking this super-variety of food that has come up in life.
Later this week: AJ is pushing for us to make Cottage Pie, and I think I'm going to go with it, despite my counter-suggestion for Fattayer Sabnegh modified with a meat filling instead of spinach. I'm sort of curious since I don't usually like meat pies but this one sounds good (besides, she doesn't know it yet but we're eating the Fattayer for dinner on Monday)
Also on Saturday: Pizzadillas, Weird Mozzarella sticks, and Snackoos! The unhealtiest but possibly most awesome experiment day ever.
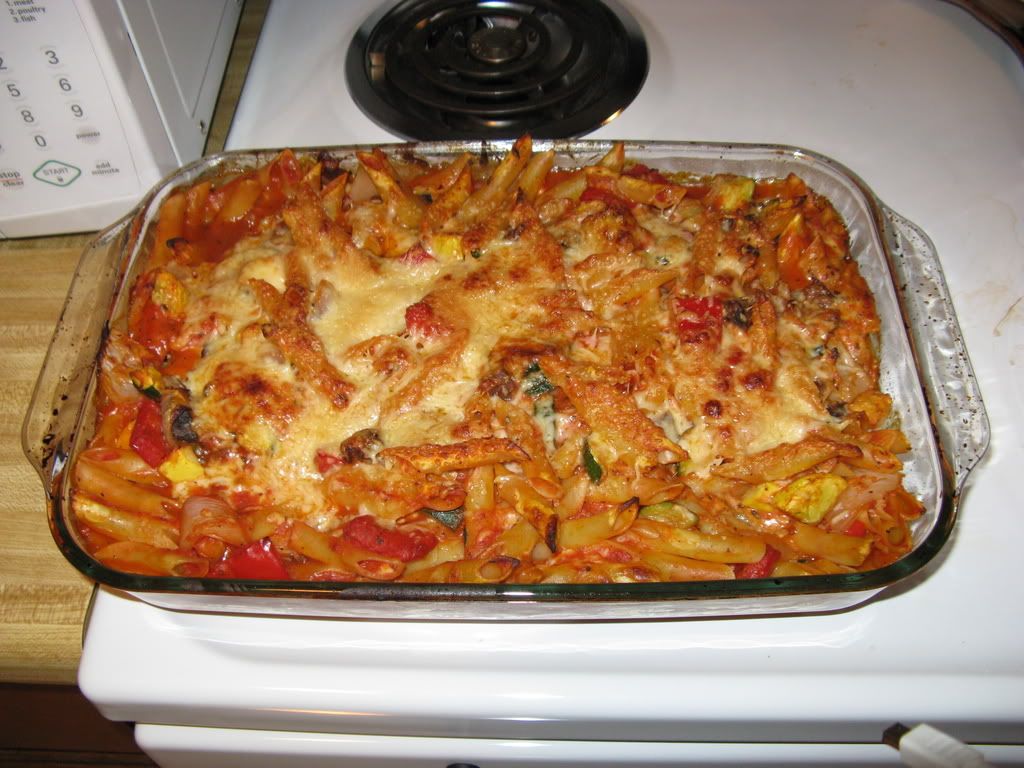
Baked Penne with Roasted Vegetables
But to be honest, the other day I just felt like I was getting tired of eating meat. I mean, look at all the things I've made on the blog: meat galore. And normally this is not a problem for me: Man like meat. But when I came across this recipe for baked vegetarian pasta, I was oddly intrigued and felt suddenly compelled to make and eat it.
The Original Recipe Link
The original is a recipe by Giada DiLaurentis from the Food Network (you know, the pretty one with the abnormally large head?). The problem with using the Food Network website and subsequently following all the recipes for these famous chefs is the ability to obtain their fanciful ingredients and the cost of buying those fanciful ingredients. Also, there's personal preference and taste, etc, so I slightly modified this recipe as such:
2 red bell peppers
3 small green Italian squash
3 small yellow squash
1 Portobello mushroom
1 yellow onion
1/4 cup extra virgin olive oil
1 teaspoon salt, divided
1 teaspoon black ground pepper, divided
1 tablespoon herbes de Provence
1 pound penne pasta
1 jar Newman's Own marinara
2 cups of grated mozzarella
lots of parmesan (whatever was left in our bag)
This is a good recipe, but it does take some time: if you want to use this for a "quick night" meal you could slice up your ingredients ahead of time, I suppose, but the two-phase cooking does take some time.
Anyway, start chopping the vegetables and throw onto pan. The recipe says 1 in strips, I made 1 inch square-ish chunks. I suppose that's what they meant and not long inch wide strips, but interpret as you will. Put on your olive oil, half of your salt and pepper and the Herbes de Provence and mix it up. Megan wanted to help with this recipe so she did some chopping and then mixed the veggies and pepper with her hands. Throw this into the oven at 450 for about 15 minutes.
You also need to cook your penne for about 6 minutes. It takes about 12 minutes I realize now for our pot to come to a boil, so you may want to start that off while you're chopping, depending on your stove (Oh what I would do for that super-stove that brings water to a boil in 90 seconds...). Throw penne in, cook. It should be pretty hard still when you take it out; it gets cooked the rest of the way through in the oven.
If the veggies are tender (not too soft) after 15 min, take it out. Put veggies, penne, cheese and sauce into your largest mixing bowl and mix together very slowly with a wooden spoon (Megan did this part too!) then put into a greased 9x13 pan. Save part of your Parmesan to spread on top of the thing after you've poured it into the pan so you can have a nice cheesy top (pictured above).
Bake for 25 minutes. I've finally learned that our oven is way super hot, so we only baked it for 15 and it came out perfectly.
The dish is amazing. The vegetables are soft but have a slight crunch, the pasta gets soft, the cheese is melty (and crunchy on the top layer) and it's very filling. So far it's Megan's favorite meal I've made.
It should be noted that this recipe is for 6 servings so I suppose you could cut down everything and do it in a 8x6 for smaller meals, or you can have leftovers (Megan will be eating it for lunch and dinner for a while). It would also make a good entertaining dish, I think.
So vegetarians, you get a reprieve; you can eat delicious satisfying meals without having to kill a furry thing.
=====
Later this week: I'll be doing a Lemon Greek Chicken for Wednesday, so that's cool. But I'm excited for Friday: AJ and Rachelle are coming over and AJ and I are going to do...something! We haven't decided yet but with the powers of Price and Ing combined the results can only be amazing.
What do you think?: I'm thinking about starting blog out the cost of the ingredients I use. The news keeps talking about the rising cost of food in America and I'm curious to see how accurate they are. Fair readers, would you find this interesting?
Style
But onward we press. I decided that since I didn't have a ton of recipes to shove down your throat I'd as you, the readers, a question:
What's your cooking style?
Me, I'm definitely a mise en place enthusiast: get everything out, set it on the counter, methodically use all of your ingredients and wash your stuff as you move along. Makes for less clean up (sometimes) and orderly cooking; it also prevents me from missing a ingredient or a step.
As for the actual recipe, I have a magnet with a clip on it (an Aloha shirt; we got it in Hawaii) that I hang onto the smoke vent above the stove and let the recipe hang in front of me so I can read it as I work along.
I love having the right tool for the right situation, but I never let that get me down; I'll improvise if needed. I won't let it stop me from doing a recipe or a style of cooking if I really want to do it.
Anyway, please share your methods and techniques: I'm curious!
Hey! Objection! What're you doing!
Hey, I actually make some stuff.
Why? Who knows. I feel like writing about it. Plus, I might be able to use this a chronicle/recipe notebook as time goes on so I can figure out what I did wrong, etc. So fair readers of the blog, prepare to read about food now and again.
First, I should note that I like cooking. It's quite a creative endeavor, if you think about it. Sure there are some rules to follow (ex: do not replace "chicken" in chicken recipes with something unrelated...like Cheerios.) and some things to think about in terms of cooking thoroughly, etc. (ex: do not add milk to chicken and eat in bowl as if they were Cheerios.) But all in all, it can be a fun and somewhat improvisational experience.
Lately I've been trying to expand my repertoire, so the improvising is sort of on the backburner as it were. The last thing I did improvisational was add chili powder to the Lawry's taco mix. It was good, but not exactly a stroke of genius. They won't be asking me to host a show on the Food Network just cause I put something into something else, that's for sure.
Anyway, with upcoming legal programs in my future and Megan continuing work and school, I've been searching for recipes that will make good, relatively quick-make dinners for Mon/Wed and yet have enough leftover for Megan to eat some on Tues/Thurs (I'll have to go straight from work to UCLA, so it'll be a ton of Subway for me, I'm afraid.) As a result, I've been perusing the Food Network website trying some new recipes and I've met with some mixed success. Here's a rundown!
Beef Tacos
Get some beef and tortillas. Then Lawry's taco seasoning and add 2-3 pinches of chili powder. What, come on, you know you wanted to know what I did.
Campfire Pan-Roasted Chicken
Here be the link.
The name of this recipe confuses me to no end: there is no open flame involved, and when I read something like that I'm expecting...I don't know, cowboy food? But this is definitely an Asian-influenced pan chicken. This was a great recipe and it came out very good. In my opinion, chicken breasts on a pan need to be sliced in half, especially if you're stuck like me using a crappy electric stove (ours is brand new, and it still pretty much sucks.) so just give it a halving before you toss it in the marinade bag. One might want to prep this on a weekend, it takes a lot of "start up ingredients" that you may not have already (soy sauce and peanut oil in particular) but once you have those you could probably make it 6 or 7 times before you ran out of ingredients. The rest you buy fresh or during your weekly market run. It's a very tangy, salty recipe, just on the border of too salty. If you're sensitive to that sort of stuff you may want to ramp back on the added salt. I made this with roasted shiitake mushrooms from this recipe but with just shiitake, not a bunch of others. Really good.
Chicken Marsala
Here be the link.
This one is from our favorite "bam" yelling friend, Emiril Lagasse. In general, I find most of Emiril's recipes to be way too complicated or time consuming for a weeknight meal and I just haven't had the courage to go for one on the weekend. This one, however, is a good recipe. Again, it takes a lot of start of up ingredients, this time in the form of spices, in order to prepare the "essence of Emiril", which is included on the same recipe link. This adds, I'd say, about 10-20 minutes to your prep time but once you've made a batch you have quite a bit left over; you can just keep it in an airtight canister. If I were at home, I'd take a picture to show you mine, but you're stuck with using your imagination for now. You'll also need to buy Marsala wine, and if you've never done that for cooking before, get the "Dry" version, not the sweet. This recipe ended up being really good too; we had a minor crises when I forgot to get chicken stock and Megan had to run to Vons and pick some up, but despite that, it wa quite good. Doesn't really need a side dish either, because of the mushrooms already used in the dish.
Chicken Faijtas
Here be the link. I just used two chicken breasts instead of the beef.
My dad has been using this recipe for a LONG time and it's one of my favorites; unfortunately, it is DEFINITELY NOT a good weeknight recipe. I prepped the marinade on Sunday then tossed it in the bag on Monday morning, and still it felt like a lot of work to cook Monday night, particularly because of the vegetables, and problems I had using a cast-iron grill pan. When using a cast-iron grill pan, you HAVE to halve your chicken breasts; this was the time that confirmed it. Otherwise the outside gets scorched while the inside does not cook, which resulted in me having to jury-rig a "cut" of the chicken in order for the heat to get to the interior. The final result was still very delicious, but all in all I think that this is best done A) on the weekend B) using a real grill. Trying to do it on a weeknight with a grill pan just makes the whole experience too stressful to enjoy, and the amount of prep work you need to do the day before is quite extensive. Still, if you're having a party or something, definitely give it a shot.
Lasagne
The recipe is on the box of Barilla ready-to-bake noodles. My variant removes the ricotta cheese and replaces it with more mozzarella.
Yikes. Epic. Fail. The entire edge of the lasagne was burned and crunchy, and was generally inedible. The center was really good, and I ate that anyway, but Megan decided to opt out and go to Baja Fresh. Oh well. I think the problem was despite following the recipe, there wasn't enough sauce, and it left a lot of exposed, un-wetted noodles to simply incinerate in the oven. The other option could be the foil: I think that maybe I didn't cover it tightly enough. Megan thinks the foil is the cause of the burning. In either case, I'll have to fiddle with the variables a bit to try and make it better. It's also just on the edge of taking a bit too long to make for a weeknight, but it's manageable, probably takes about 1 hour 20mins total to brown the meat and then bake the lasagne. Even though it takes some time, it's a pretty automatic recipe since you mostly just sit and wait, so there's an advantage in that.
Well, that's about it for the recipe report. I have a Greek Lemon chicken recipe slated for the weekend, and I think it's about time for some beef kebabs and this parmesean fry recipe I've been waiting to use for next week. I'll let you know how those turn out.
By the way, if you have a recipe you think would be good for weeknights, post it in el commentolos, and I'll give it a go.
Food Friday Roundup...er...oops.
Moving along!
Monday - Spaghetti di Rockney
No linked recipe for this one, as it is mostly a recipe used by Megan's family, slightly modified with some elements from a recipe my parents used to use.
Ingredients
Fettuccine Noodles
1 Jar of Newman's Own Marinara Sauce
Sweet Italian Turkey Sausage
Dried Oregano Leaves
Pretty easy recipe; we've made it a billion times so there was no adventures in new skills regarding this one. Meg prefers Fettuccine noodles, as they are wider, so we use those. Dump salt into your pot, boil the water, throw the noodles in. Pretty straight forward.
For the meat sauce, take the Sweet Italian Turkey Sausage (Jenie-O is the brand we use) and throw it on a pan. Now, normally I hate using Turkey as a meat substitute for things like ground beef and the like, but this particular sausage is really, really good. So no complaints from me from this particular turkey product. Anyway, the sausages come in links, not ground, so what you have to do is push the filling out of the skins. Two ways you can do this; Megan does it by hand before putting it in the pan, I usually just squish it out with a spatula while it's on the pan. Either way is find. Throw away the skins and break up the filling and brown as you would with regular sausage or ground beef. Sometimes there's enough fat to merit draining, sometimes not, do as you prefer.
Once the sausage is browned, dump the sauce into the same pan (use a pretty big pan). You could also move everything into a saucepan I suppose, or a pot, but since I try to use as few utensils as possible to save on cleaning times, I use one pan. Newman's Own Marinara sauce is, in my opinion, the BEST on the shelf marinara sauce there is. Period. It's a bit more expensive than other brands, but it's definitely worth it.
Mix the sauce with the sausage. Add the oregano in here if you want; try it with and without to see which you prefer. Sometimes I forget the oregano and it's not a huge deal, but I think it gives it a little something extra. Not a ton, just enough to sprinkle lightly across the surface should do.
And that's pretty much it. Makes good leftovers if you make enough.
Wednesday - Beef Kebabs and Oven-Roasted Parmesan Fries
Here be the link for the Fries.
Ah, beef kebabs. Again, a tried and true food item for us. We usually just buy pre-made kebabs from Ralphs or Gelson's (Ralphs is preferable, as they are slightly cheaper and slightly larger) and cook them in the oven...a bit trickier than maybe using a grill, but for ease and convenience we use the oven. I may get bold in the summer and try our public grill, but for now it works.
For yesterday's quest, I started with the fries first, as they took more preparation. Peel, slice, boil, bake, sprinkle, bake was the process in a nutshell. My slicing is still terrible; very inconsistent. I think it was starting to resemble some sort of consistency by the end of the second potato, but still something that I'll have to continue to develop with practice.
By the way, the recipe calls for 5 potatoes, but we don't need that much. In general for other fried potatoes/fries I've made, I usually do one potato per person; thus two. I also throttled back on the amount of salt used in the bowl, since 1 tablespoon for two potatoes is a lot, and it's much easier to add salt after the fact rather than somehow magically remove it.
So, slicing was ok, boiling was odd. It never did come to a full boil, though I was using my largest pot with the pasta filter in it (for rapid, easy draining of the potatoes). I just kept checking them for softness per the recipe's instructions by using the paring knife, and then just pulled them out.
I didn't bake them long enough. I was on a time constraint since I needed to use the oven for the kebabs as well, so they were still sort of...soft fries. I like soft fries so it wasn't a huge deal, but Megan likes them crispier, so next time I'll do them longer. I think I may also spread the fries onto multiple cookie sheets next time; one seemed a bit too crowded to crisp them rapidly.
So after I cheesed them I dumped the fries into a basket and began kebab cooking. Same cookie sheet, just set the kebabs on there and use a high temperature. In the past I've used the broil setting, which works fine; yesterday I tried it at 450, which was also fine. No real difference, I didn't think. When I cook them, I start with 7:30 per side, then 3:00 per side, then 1:30 until I think they're done (usually checked by cutting open the largest chunk.
I have to admit at this point that while the pre-made kebabs are convenient, I'm starting to feel annoyed by them. The pieces of meat used are quite varied in size, so by the time you get the larger pieces done perfectly, the smaller ones are a little over-done. If I were to do this on a weekend, it might be worth the time to build them myself. I suppose I could pull the more done pieces out earlier, but that makes them not-kebabs anymore as they are removed from the stick. Then again, we tend to pull them off the stick and eat them with a fork and knife anyway...so maybe it's a moot point.
Anyway, this was a successful meal. Just a few notes for the fries for improvement and I think it'll be perfect.
Future Projects!
I'm off to the store tonight, I think, to get things ready for next week. Usually I shop on Sunday, but we won't have a lot of time with the trip and all, so I'll just freeze everything until then. On the docket for next week, at a minimum, is a Pepper Chicken with Lime sauce. I went through the bookshelves last week and found all of our cook books (to which I was surprised at how many we had) and moved them to a smaller bookshelf that we recently bought from Ikea for my law books. Now that they're much more accessible and closer to the kitchen, I can delve into them more frequently. The Pepper Chicken is a recipe from a Williams-Sonoma book we bought, so I'm excited to give that a go.
I also want to make a Minestrone soup to freeze for Megan to have for dinner on the nights that I'm gone. I may do that tonight and report later on how it turned out.
Oh! This one is awesome. Last week, my brother called me and asked what I was doing. Since we had leftover tortillas and cheese from the Fajita Fiasco I was making microwave quesadillas (my microwave can make a perfect quesadilla in 30 seconds). But when I said quesadillas, he thought I said Pizzadillas. And now we're obsessed with the idea of making a pizzadilla. I'll let you guys know how that one goes too.
Once again, any shared recipes will be appreciated. I haven't pounded any chicken yet, Matt, but I did get a tenderizer so I'm ready to go for next time.
Friday Food Round-up No. 2!
Monday - Pepper Chicken with Lime Sauce, Rice, Roasted Green Beans
Link for the Green Bean Recipe!
Rice just used a Rice Cooker...
Pepper Chicken with Pepper Lime Dip - Cambodian Dish from the "Savoring Meat and Poultry" book by Williams Sonoma.
Ingredients
2 Boneless Chicken Breasts, with skin
1 teaspoon peppercorn
1 teaspoon sea salt (says coarse salt; I suppose you could use regular salt too)
1/4 cup soy sauce
2 tablespoons sugar
1 tablespoons vegetable oil
6 cloves of garlic, quartered
For the dip: 2 limes, 1 tablespoon ground black pepper, 1 1/2 teaspoon sea salt
Ok, I should start out by stating that the recipe is slightly modified from the one in the book. The book recipe called for like, two whole chickens. But since there are but two of us, I nerfed it down to two breasts. Normally we eat boneless/skinless, but the picture in the book had yummy looking skin so I opted for a bit of extra fat and got some with skin still on. Also, the original recipe called for mushroom soy sauce. I looked at Gelson's for mushroom soy sauce, but I haven't a clue what it is or if it's sold; in all my years of growing up in a semi-Asian household I've never heard of mushroom soy sauce. I wondered if maybe it was something you had to make, but there were no instructions. So I just used regular soy sauce.
For this sucker you have to marinade first. Crushing peppercorns without proper tools is not an experience I would recommend; the book said to use a mortar, but I don't have one. So I used a bowl and an ice cream scoop. It worked out, but it was tiring and in someways quite needless since I do have ground pepper. In any case, you take the peppercorns, quarter the garlic and smoosh it together. The book said to make a paste, but I didn't, I just kinda...mixed it up. I added that to the soy sauce, sugar, oil, and salt and threw it with the chicken into a ziploc bag. I tend to do all my marinating in ziploc bags; you can just throw them away when you're done and they seem to get the job done. It's also easier to concentrate the marinade straight on the meat by turning the bag in certain directions, so when you are marinading for a short period of time (I only marinaded it for 45 minutes) it gets a concentrated effect. Time listed in he book was 1 hour to overnight.
While that sucker was marinading I prepared to use my rice cooker for the first time. Now, attention white people: rice cookers are the ONLY way to make good rice. Period. The end. I don't want to hear arguments about it. You also must use white, long-grain rice; I've always eaten Calrose and had good experiences with it. I've seen people try to make rice other ways and it never comes out the same. Besides, why go through the trouble? With a rice cooker it's dump in the rice, dump in the water, push a button, wait twenty minutes. It's super easy and super effective, so don't go and start boiling stuff in a pan.
I'll reserve my comments about putting butter on rice for another day.
Ok, rice now on auto-pilot as well as the marinading chicken, I had an issue about what to do for a vegetable component. I had picked up green beans and broccoli (for me and Megan, respectively) but I didn't feel like steaming them or sauteeing them, and I hate boiled vegetables (not to mention they apparently remove vitamins, so why bother?), so I ran to the internet to do a quick search. I used a new tool I found called the Food Blog Search, which...well, searches food blogs, and came to a recipe for Roasted Green Beans with Onions and Walnuts. Ironically it was from a blog Jeni had previously suggested I check out, so I knew it was probably a good one.
Now, this one took a little improvising on my part; having not intended to make this side dish I was lacking in a few ingredients; I did happen to have a red onion lying around, but walnuts were a no go and I wasn't sure replacing them with peanuts would be the way to go (not to mention I didn't feel like unshelling said peanuts). I was also out of garlic cloves; I used the last of them in the chicken marinade. So I just used some garlic powder instead with a rough estimate as to how much would be about right. Another super-easy recipe: pre-heat to 450, oil the beans and onions slightly, make the "drizzle" and add at the end.
Cool.
So, oven is now pre-heating, it is now time for me and Mr. Grillpan to go for round three. Taking Matt's previously commented advice, I super-heated the sucker and pounded the chicken as flat as it would go prior to marinading. The beans took about 10 minutes so I put them in right before I threw my chicken on the pan for the suggested "3 and 3" round. Well, six minutes of filling my apartment with smoke later and...
...nope.
Still cooked the outside but not the inside. Inside was as raw as the day they slaughtered that bird. I suppose they're just too thick or that electric stoves and cast iron grillpans are simply not meant to replace a real grill. So, the grillpan and I are on speaking terms only as far as it concerns steaks and hamburgers, the only things it has managed to do correctly.
But! Not all was lost! The outside was beautifully lined and the skin nice and crisp. So, since my oven was already on at 450, I threw it in a 9x13 with a bit of oil and let it cook in there for about 10-12 more minutes. The beans came out in the meantime and the rice was on warm.
The result? Chicken was AMAZING using that process. The center was moist yet thoroughly cooked and the outside was crispy. The flavor was quite unique; the sugar put in a fair amount of sweetness, even enough to cover the usual super-salt intensity soy sauce tends to give recipes I use it with. All in all a success.
What was NOT a success however, was the lime dip. I don't know what Cambodians are like, but if they think that squeezing a lime into a bowl with salt and pepper is a legitimate sauce, then perhaps we shouldn't mix company often. I had a coughing fit the first time I tried it; super potent citrus combined with strong sea salt and added with admittedly too much pepper (I didn't count on the fact that peppercorns take up more volume and that the resulting crushing of those peppercorns would NOT equate to the same amount as using a tablespoon of already ground pepper) was just...gross.
But, since it was a dipping sauce, all was well. The beans were a fascinating mix as the two strongest flavors within it, the balsamic vinegar and the honey, interacted in a way I hadn't thought possible. Megan thought I cut the onions too thick, but other than that a totally successful meal.
I would give it a week-night doability if you're having a leisurely evening. I definitely need to try our public grill though, because this battle against the pan is getting old.
Wednesday - Italian Sausage and Bean Soup
Ingredients
1 lb Italian sausage. Use spicy Italian if you prefer.
1/2 cup chopped onion
1 clove garlic, minced
1 15oz can of great northern beans (white beans), rinsed and drained
1 15oz can of black beans, rinsed and drained
1-2 cans of beef broth (around 15 oz. We use low-sodium)
1 tbsp fresh basil or 1 teaspoon dried basil
Parmesan cheese for topping
The original recipe also called for a 1 15oz can of undrained tomatoes, but Megan doesn't like them so I took them out.
I also added crushed red pepper flakes...we'll talk about that in a second.
Ok! This is the most amazing recipe ever! It's a super-delicious stew-soup that is cheap to buy ingredients for (after buying bread for dipping, the cans of beans, the broth, and the sausage it was I think like 7 bucks) and takes like no time or skill to make!
Step 1: Brown sausage of choice. You can drain if you want, I didn't.
Step 2: Chop onion and garlic
Step 3: Rinse and drain beans
Step 4: Put all ingredients into pot.
Step 5: Simmer for 10 minutes
Step 6: Serve. Put cheese on top if you want.
Now, a few notes about personal preferences. Megan prefers a more thick stew and less soup, so her favorite is to use only one can of broth. I like more broth though, so I prefer to use two. I split this difference on Wednesday and used 1 1/2, and that seemed to make both of us happy.
In terms of spice, you can use a spicy italian sausage if you want. I decided to add pepper flakes to the sausage as I was browning them and I really liked it, but Megan found it too spicy. The first time I had this soup was during the Ing Annual Gingerbread House Making Extravaganza when my mom made it. At the time I added the pepper flakes in as I was eating it and got the same effect, so if you have different spice preferences you can always add more to your own personal bowl of soup as you go along.
I forgot the basil on Wednesday. I didn't really miss it though, so if you don't have any you can skip it and be fine.
The original recipe also only used 3/4 lb of sausage, but we like more meat.
Like I said, this is an AMAZING recipe. So delicious, reheats well, and take little time and effort. So you readers with babies might want to keep this handy for those particularly crazy nights.
That wraps it up for this week. Still no head way on the To-Try list, but since we were gone at the Young Married's retreat I didn't have time to do my Sunday Store Day (I don't intentionally try to alliterate my life, really I don't). But, I did learn a lot about cooking with alcohol from AJ and this other guy Dave, who apparently went to culinary school. So I think there will definitely be some new experiments coming up, along with delving into the list.
What'd you guys eat this week?
Friday Food Free!-...er, Three!
Only one meal was cooked this week, much to my dismay. I had planned on making a cool taco salad on Wednesday with homemade taco seasoning, but I forgot that I had a dentist appointment and it just ended up being too complicated to figure out. So, only food on Monday.
Monday - Barbecue Chicken with Garlic Mashed Potatoes
Barbecue Sauce Ingredients
1 cup ketchup
1 cup red wine vinegar
1/2 cup brown sugar
1/4 cup molasses
1 1/2 teaspoons liquid smoke
1/2 teaspoon salt
1 rounded 1/4 teaspoon black pepper
1/4 teaspoon garlic powder
1/4 teaspoon onion powder
Garlic Mashed Potatoes Ingredients
3 lbs potatoes (recipe is peeled and cubed; I used red potatoes so I just peeled. You can also leave peel on)
1 head of garlic
1/2 handful of salt
4 TBSP butter or margarine
1/4 cup of milk
I made the barbecue sauce on Sunday, after I came home from the store. This barbecue sauce is amazing; my dad has been making it for years. It's supposed to be the secret recipe used at Tony Roma's for their Blue Ridge Smokie sauce. I don't know if it tastes the same or not; it's been a while since I've been to Tony Roma's and I usually get the honey-style sauce. Regardless, it's still a very good barbecue sauce, and once you have all the ingredients super-easy to make. You just dump it all into a pot and bring it to boil, then simmer for 30 minutes. Ten put it into a bottle and refrigerate for future use. It makes about 1 1/2 cups of sauce. Works great on everything; burgers, chicken, ribs.
Now, I made the chicken by simply throwing some olive oil onto it and putting it in a 9 x 13 pan to bake. I don't put sauce on it; it just burns in the oven and it tastes just as good putting the sauce after the chicken is cooked.
Now, for the mashed potatoes. This was my first batch of mashed potatoes I had ever done, and from what I hear of the world of mashed potatoes is that they can be very difficult to do correctly, so I wasn't sure how this was going to work out. Megan felt like helping out this time, so she peeled all of the potatoes while I smashed the garlic head and peeled them. I was sorta grumpy about garlic since I had bought a pack of three heads from the store and they were all sprouted already except for one quarter of one of them. I had some garlic from a previous head and managed to get enough functional cloves, but that'll teach me to buy garlic blindly in the future.
anyway, you put the garlic and potatoes into a pot (my mom (it's her recipe) wrote saucepan, but I used a pasta pot because I thought it would be easier to drain with the built in strainer. I don't think I'd do it again; too much to clean up just to avoid normal draining procedures of the boiling water.) as well as the salt. Don't worry about it being too salty; it's mostly to help the water boil faster and the potatoes didn't soak up much of it; in fact they needed salt afterwards. Boil until they are soft. After you drain, add the butter/margarine and milk and smash together. You can add in ground pepper if you want.
The only thing I would definitely change for my procedure is how I dealt with the red potatoes. I like the flavor of red potatoes better when they're mashed, but because they were naturally smaller I decided not to cube them since they were about the size I would've cubed regular potatoes. However, it took a little extra time to cook some of the larger ones to be really really soft. In the future I would cut down all the potatoes to be about the same size to speed the process along and prevent the smaller potatoes from potentially being over-done (can you overdo a potato? I don't even know.).
The end result was great; the potatoes needed some salt and pepper, but they were smooth and creamy and perfect. The sauce was great as always (I've made it before so there was no trepidation about it) and it was overall a successful dinner.
So that's it for this week. Hopefully next week will be a little bit back to normal in terms of the cooking routine.
What'd you guys eat last week?
